Adding switches to simplify the electrical
We use the small cabinet above the TV for our "electronics". We keep the Starlink router, a 200W Sine wave inverter, and small basket of phone chargers, watch chargers, cables, remotes, etc.
I found I was constantly plugging and unplugging things to minimize power draw depending on if I wanted the starlink and/or the tv running of the Zion's 300W inverter or off the small 200W inverter (which is just larger enough to run the TV and the Starlink)
A final contributing factor is my wife can't reach the plugs at the back of the cabinet without a stool.
Hence my project was born to add switches at the front of the cabinet to control the various permutations.

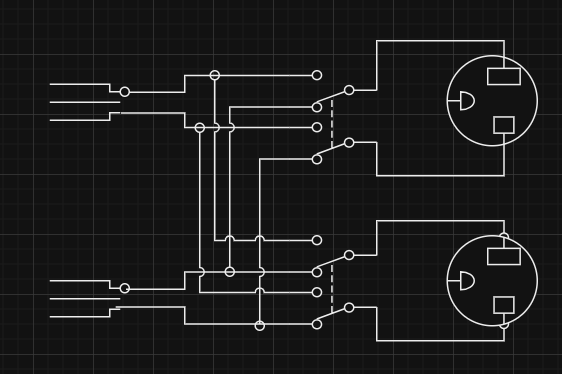
On the left is the high voltage switch that consists of two DPDT switches that allows you to connect the Starlink and/or the TV to the 300W and/or the 200W inverter.
On the right is the low voltage side that turns on/off the 200W inverter as well as the powered TV antenna.
For the high voltage side, here is the schematic:
I used a project box (in hindsight I would have ordered a slight longer version), ring connectors, a couple extension cords, and DPDT switches all from Amazon. It was a tighter fit then I wanted, but managed to get everything connected (with ring connectors on everything). I then filled the box with duct putty to combat the vibrations in the van.


For the low voltage side, I used 12V rated SPST switch and the same project box. In the cabinet removed the cigarette lighter jacks and the antenna plates. I used spade connectors to connect inline to one of the cigarette lighter jacks and spliced in to the power lines to the antenna. When I removed the plate I noticed that one of the CATV F-Connectors was not connected to anything, so I removed it ran the low voltage cables out the hole.


Post a Comment